1. Log the trip itself
From the Dashboard, click Log a trip (or + Log trip from the Range page). Fill in the basics:
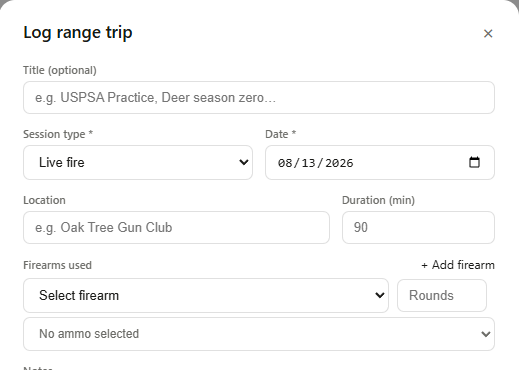
- Session type — Live fire, Dry fire, Competition, or Training
- Location and duration
- Firearms used, with rounds fired for each
- Ammo used, pulled from your existing ammo inventory — so your round count automatically comes off that lot
Click Log trip and you're done with the basic record. But if you want to track how a particular gun and load are actually grouping, keep going.
2. Attach a target photo
Open the trip you just logged, switch the photo category dropdown to Target, and click Add photo to upload a picture of your target. GunCollector separates “Range” photos (setup shots, gear, whatever) from “Target” photos, which is what unlocks group measurement.
3. Open the group-measurement tool
Every photo has a small scissors icon — click it, then switch to the Measure Group tab in the photo editor:
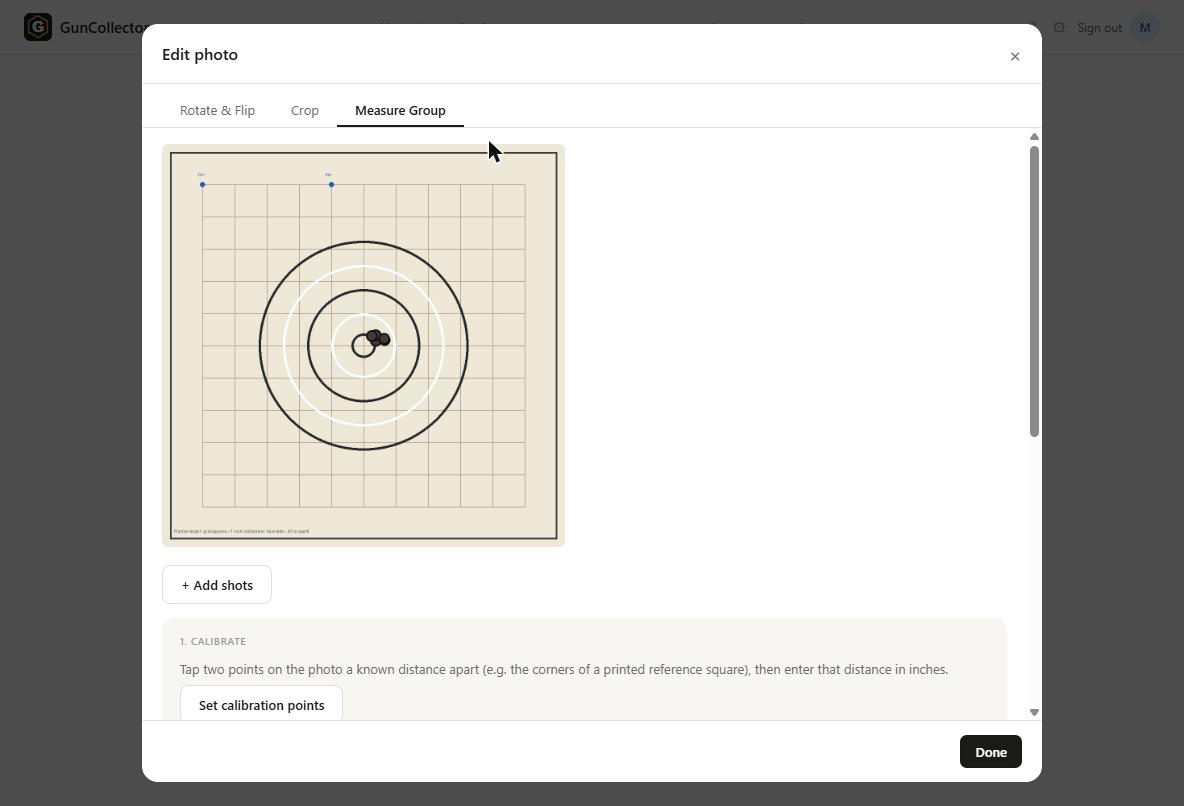
Step 1 — Calibrate
Group size math only works if GunCollector knows the real-world scale of your photo. Tap two points on the image that you know the actual distance between — the edges of a printed grid square, a known-width target marker, anything with a fixed size — then enter that distance in inches.
In our test target, we used two reference points 4 inches apart:
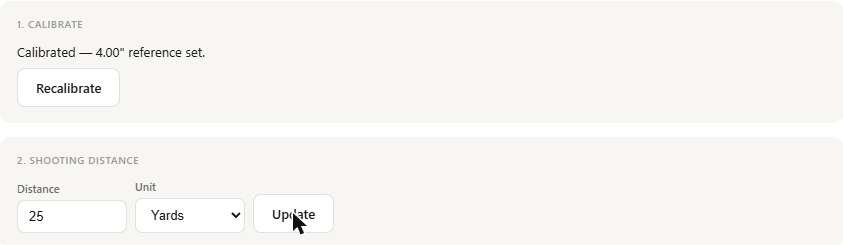
If your targets don't have a built-in reference, GunCollector has you covered — there's a Download printable reference target (PDF) option right in the calibration step, sized so you always have a known measurement on the page.
Step 2 — Set your shooting distance
Enter how far you were from the target (yards or meters). This is what converts your group's physical size into MOA and MRAD, not just inches — useful for anything zero- or dope-related down the line.
Step 3 — Mark your bullet holes
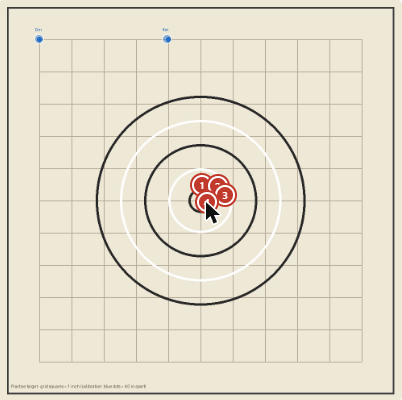
Click Add shots, then tap each hole directly on the photo. Each one gets a numbered marker, and you can drag any marker afterward if you need to nudge its position:
Step 4 — Create the group
Select the shots that belong together (click each marker, or use the chip list), optionally name the group, and click Create group. GunCollector immediately computes the numbers:

You get both extreme spread (the widest distance between any two shots) and mean radius (average distance from the group's center) — each expressed in inches, MOA, and MRAD.
4. Track it over time
Every group you measure shows up on that specific firearm's Accuracy tab, building a history you can look back on:
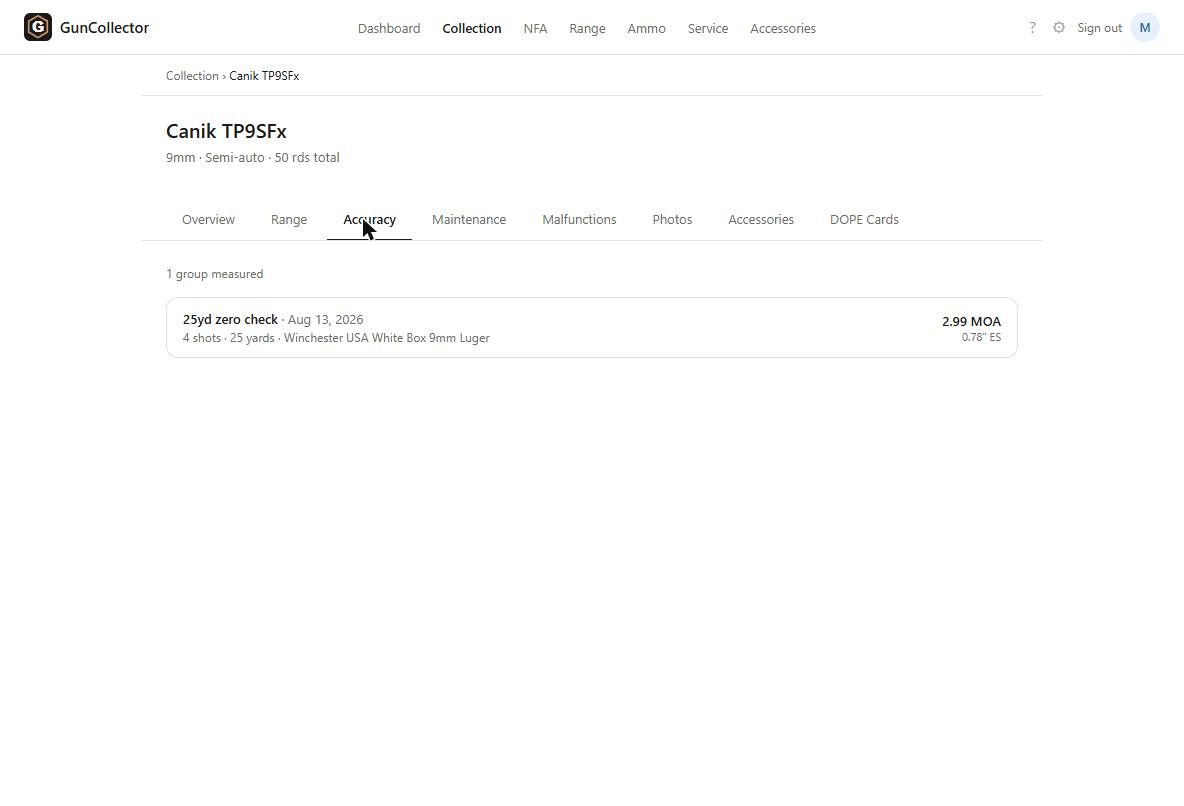
Because the group is tied to both the firearm and the ammo lot you selected when logging the trip, you end up with a running record of exactly which gun-and-load combinations actually shoot well — not just a vague memory of “it grouped okay.”
Why bother measuring at all
If you're testing loads, confirming a zero, or just want objective proof your rifle is still shooting the way it used to, “eyeballing” a group gets you nothing you can compare six months from now. A few taps on a photo gets you a real number, tied to the exact gun and ammo that produced it.